Shotlane / How-to guide
How to annotate a screenshot on Mac
Show what matters with arrows, text, numbered steps, highlights, or mosaic.
· Shotlane
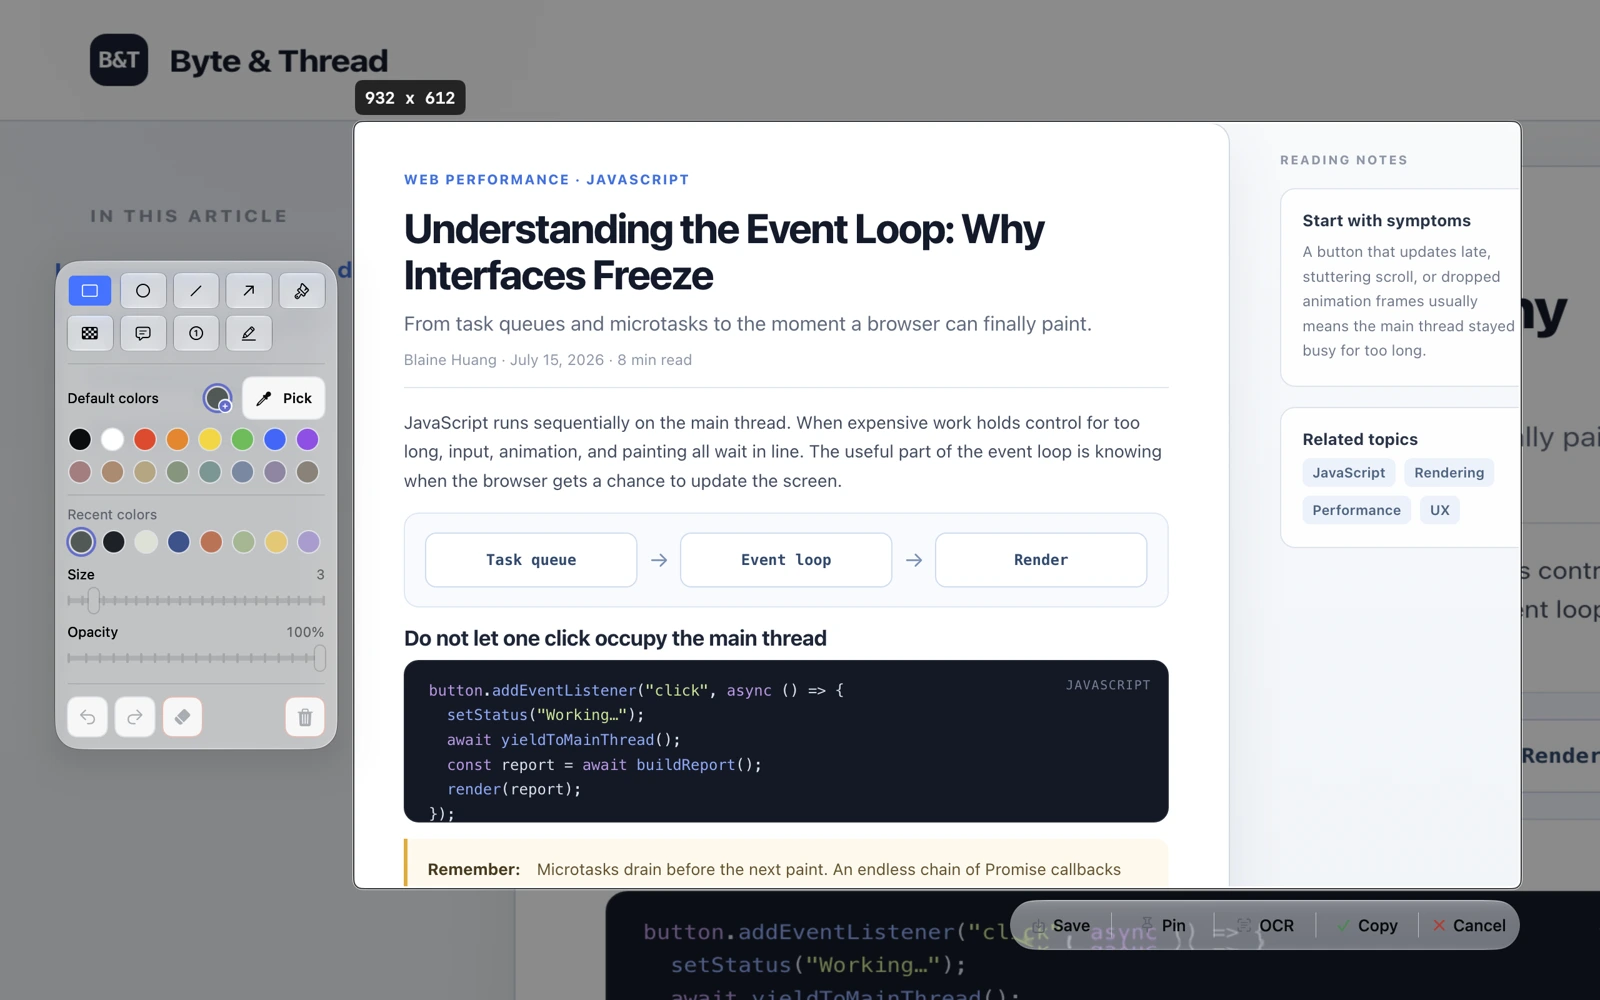
A useful screenshot often needs one more step: show the other person exactly where to look. Shotlane opens a local annotation workspace after capture, where you can add callouts before copying, saving, or pinning the result.
Mark up a screenshot
- Capture a region, window, or full display in Shotlane. Open the annotation workspace when the capture finishes.
- Choose an arrow for a specific control, a shape or highlight for a larger area, or text and numbers for a sequence of steps.
- Use mosaic when an area should be obscured in the exported image. Check the finished export before sharing anything sensitive.
- Move, resize, or restyle an annotation if it covers important content. Undo or redo edits as needed.
- Copy the finished image, save it to a local folder, or pin it as a reference above another window.
Make the message easy to scan
Use one visual cue per point. Put numbers in reading order, keep text labels short, and leave enough uncovered space around the target. A screenshot filled with callouts can be harder to understand than the unmarked image, so remove marks that do not explain the task.
Export and review
Shotlane supports PNG, JPG, WebP, and PDF export. Choose the format and file name in its export settings. PNG is often a practical choice for crisp UI text; JPG can be smaller for photographic content. If the image contains private data, inspect the saved file itself before you send it.
Built-in Mac markup
macOS also provides Markup for files. Shotlane brings annotation into the capture flow and keeps the resulting files under your control.
For a webpage longer than one screen, use scrolling capture first. If the words themselves are what you need, use local OCR.